Email Accounts setup in Microsoft Outlook 2013
This short tutorial provides the settings for cPanel email account in Microsoft Outlook 2013. Follow these simple steps to configure your email account in Outlook 2013. You must first log into your cPanel to create the email account. Once you have created the email account, you can follow the steps below. These settings are similar in older versions of Outlook as well if you are familiar with the interface to add new account.
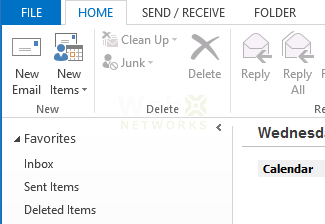
Step 1: Open Outlook and Click "File"
Launch Outlook 2013, then click File in the top-left corner.
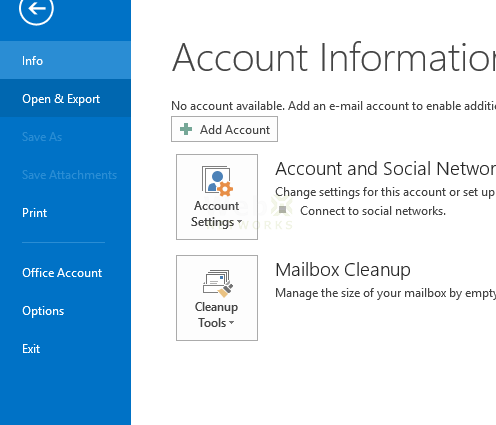
Step 2: Click "Add Account"
Click the + Add Account button to start setting up a new email address.
Step 3: Select Manual Setup
Choose Manual setup or additional server types, then click Next >.

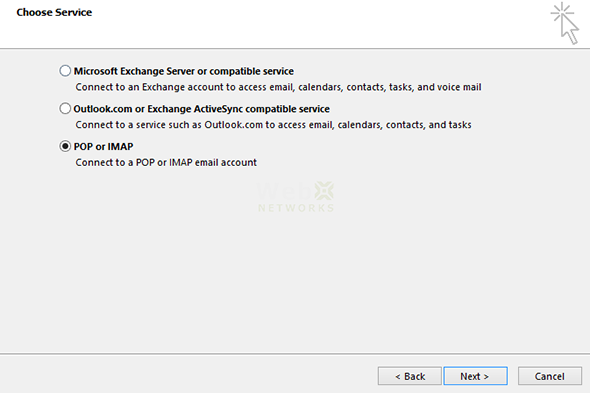
Step 4: Choose "POP or IMAP"
Select POP or IMAP, then click Next >.
Step 5: Enter Email Account Information
Fill in the following fields based on your email account:
User Information:
-
Your Name: The name you want recipients to see
-
Email Address: e.g.,
[email protected]
Server Information:
-
Account Type: Choose IMAP (recommended) or POP3
-
Incoming Mail Server: Usually
mail.yourdomain.co.zw -
Outgoing Mail Server (SMTP): Usually
mail.yourdomain.co.zw
Refer to your hosting welcome/activation email for the exact mail server names.
Logon Information:
-
Username: Your full email address
-
Password: Your email password

Step 6: Click "More Settings"
You can change the email to an easy to remember identity e.g. Work Email etc.

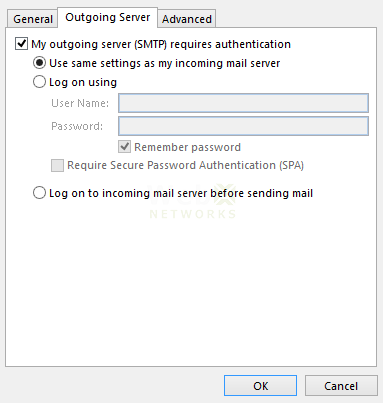
Step 7: Click on Outgoing Server tab
Select the check box My outgoing server (SMTP) requires authentication
And select Use same settings as my incoming mail server.
Step 8: Click Advanced tab and enter the following values:
Incoming server(IMAP): 993
Outgoing server (SMTP): 465
Use the following type of encrypted connection: SSL
Click [ OK ] and Click [ Next ] and this will test incoming/outgoing server for email and finish setting up the account in Outlook 2013.
